Integrating with PrestaShop
This page explains how to integrate the Cosmos Pay Module on your Prestashop website.
(Preparation) Creating your Wallet
Requirements:
- A desktop computer
- Firefox or Chrome based browser
- Install and add the Keplr Browser Extension to your browser by clicking the "Add to Brave" or "Add to Chrome" button depending on your browser (1). Click the 'puzzle' icon to open your extension bar (2), and click Keplr (3) to start the creation of your wallet.

- Choose “Create new account” (1).
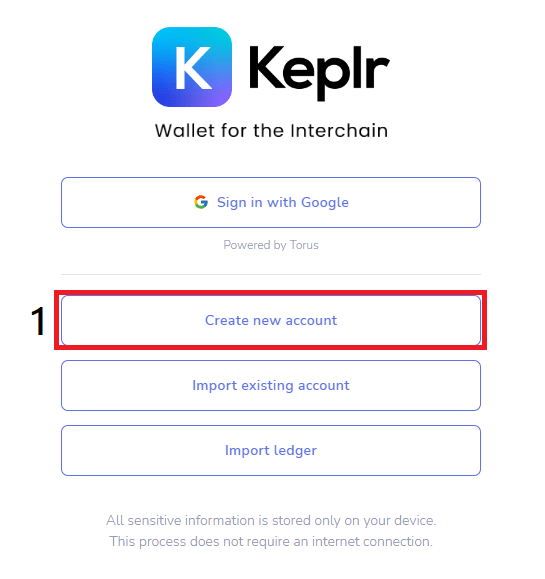
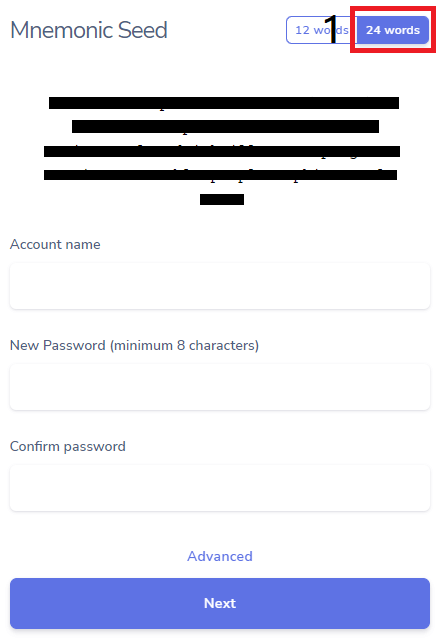
Make sure to save the seed phrase of your Keplr account in a safe place because your wallet is only recoverable through your seed phrase. We recommend to use 24 words (1) for your seed phrase, and backing up your seed phrase in at least 2 different physical locations/hardware (not on your computer as it is prone to malware).
NOTE
Anyone with access to your seed phrase can access your account. BitCanna cannot access or recover your account.
- Next, choose an account name (not important, just a descriptive name for your wallet) and your password. The reason why you set a password is to avoid filling out the seed phrase to access the wallet. This way your wallet is locally protected. If you ever lose access to your password or your device, you can use the seed phrase to recover your account.
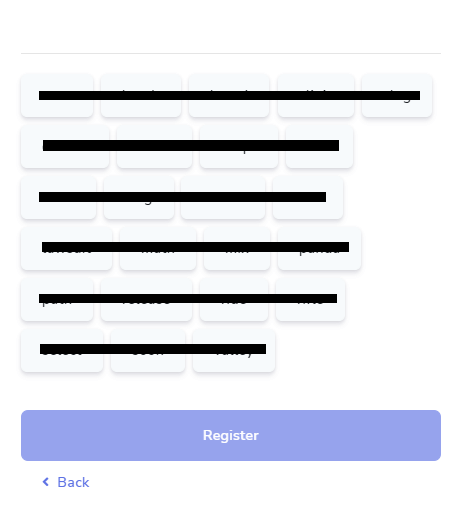
- You’ll now be asked to click the words in the correct order to check if you stored the phrase correctly. When this is completed, click “Register”. You’ve now created your wallet!
Installing the Module
Download the Cosmos Pay Module from our Github repository as a ZIP file.
Direct download: click hereUnzip the ZIP file and rename the folder inside "cosmospay-prestashop-main" to "cosmospay".
Zip the file again, the name of the ZIP file itself is not important.
In the admin panel of your Prestashop website, click on "Modules" on the left-hand side, and click "Module Manager". In the Module Manager, click on the "Upload a module" button and upload the ZIP file you downloaded in step one.
(Optional) Enabling notifications on Github for PrestaShop
If you want to enable notifications of new releases of the Cosmos Pay plugin for Prestashop, then follow this guide. This will allow you to set up an alerting system which will give you a notification when there is a new release of the plugin available. Creating this notification service can be done in just a few steps.
Go to GitHub and create an account or log in if you already have an account (note: use the email address where you would like to receive the notifications).
Head over to the CosmosPay for PrestaShop repository on Github.
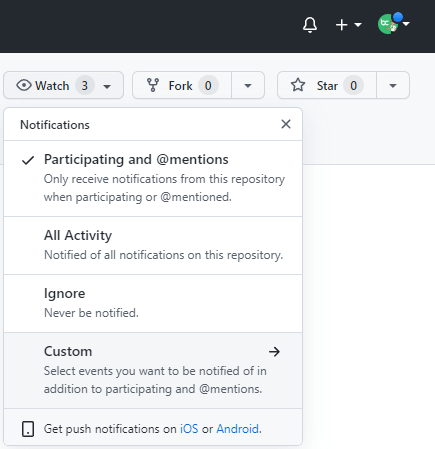
Click on the small arrow on the right side of the button “Watch”. A menu will appear, select “Custom” from this menu:
- Select the events for which you would like to receive a notification. If you are only interested in new releases, then make sure to only select “Releases”. Select “Apply” afterwards: is menu:
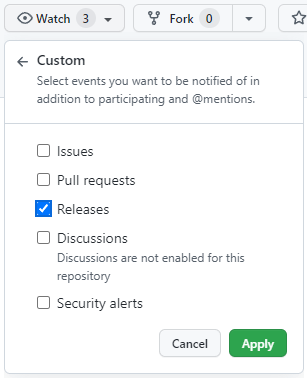
- The “Watch” button has now been changed into “Unwatch”; signalling that your notification service has now been set up. It will send you a mail on the address linked to your Github account when there is a new release of the Cosmos Pay plugin.
Plugin configuration
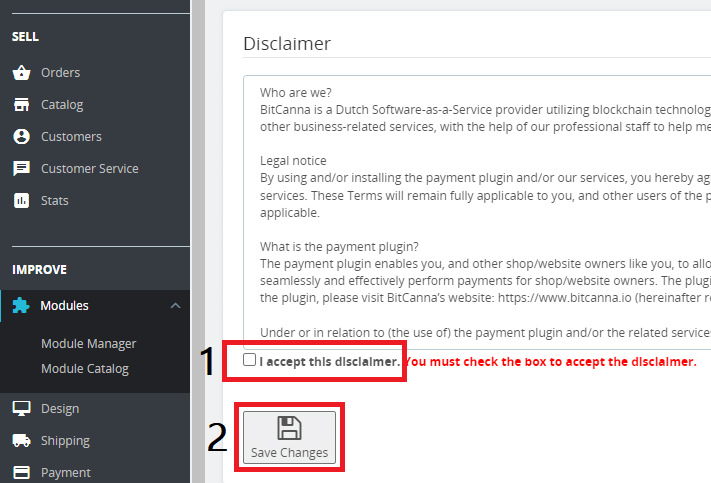
- Now head back over to PrestaShop and click on "Modules" (1) and "Module Manager" (2). In the Module Manager, search for the recently installed Cosmos Pay Module, and click "Configure" (3).

- Read the disclaimer, check the box "I accept this disclaimer" (1) and click "Save Changes" (2) to accept the disclaimer.
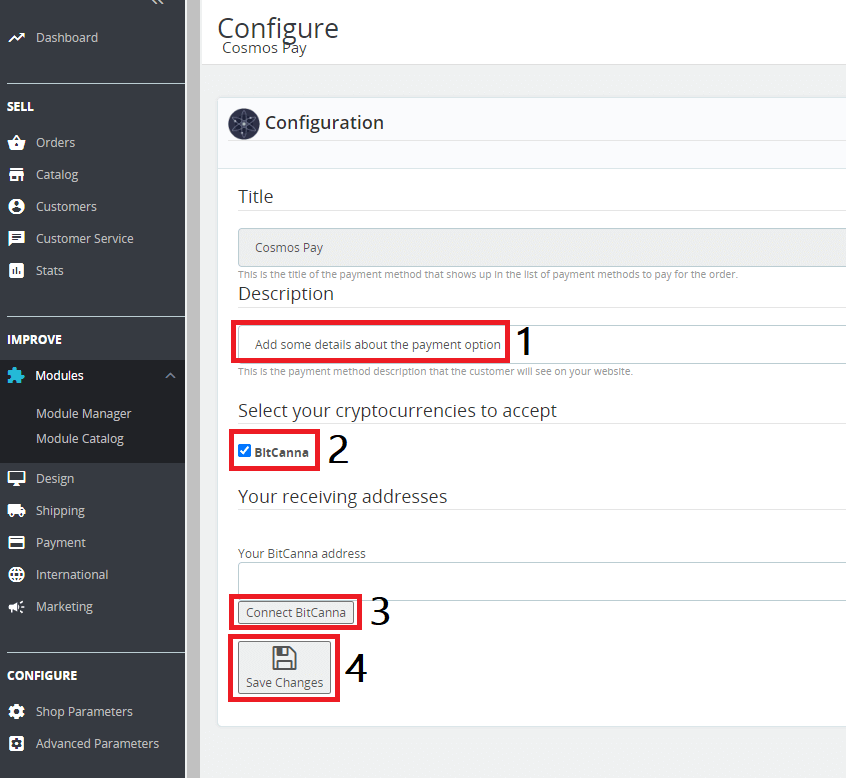
On the configuration page you can add a description (1), and choose the available cryptocurrencies (2) to accept on your store.
Click “Connect BitCanna” (3), and approve the Keplr pop-ups to add the blockchain to Keplr, and allow WordPress to make calls to your Keplr wallet. Your BitCanna address should be automatically filled out (once multiple cryptocurrencies are supported, you can accept up to as many blockchains you’d like to accept as currency). After filling out the address, our address validation script will check if the address has the correct format. Don’t forget to click “Save Changes” (4) after you're done editing!
You’ve now successfully set up the Cosmos Pay plugin on your webshop. Last but not least, we'll simulate a payment using the module.
Simulating a payment with PrestaShop
Head over to your webshop and select the "Cosmos Pay" payment method to pay for your order.
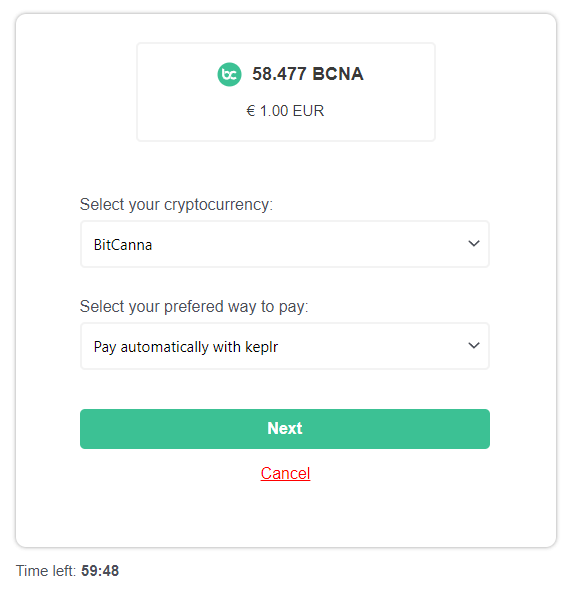
Select your preferred cryptocurrency and your desired method to pay. By default it is recommended to "Pay automatically with Keplr". Click "Next".
- The Keplr Extension window will automatically open and prefill your transaction to the receiving address of your webshop, and prefill the memo to identify the transaction. All you need to do is hit "Approve".
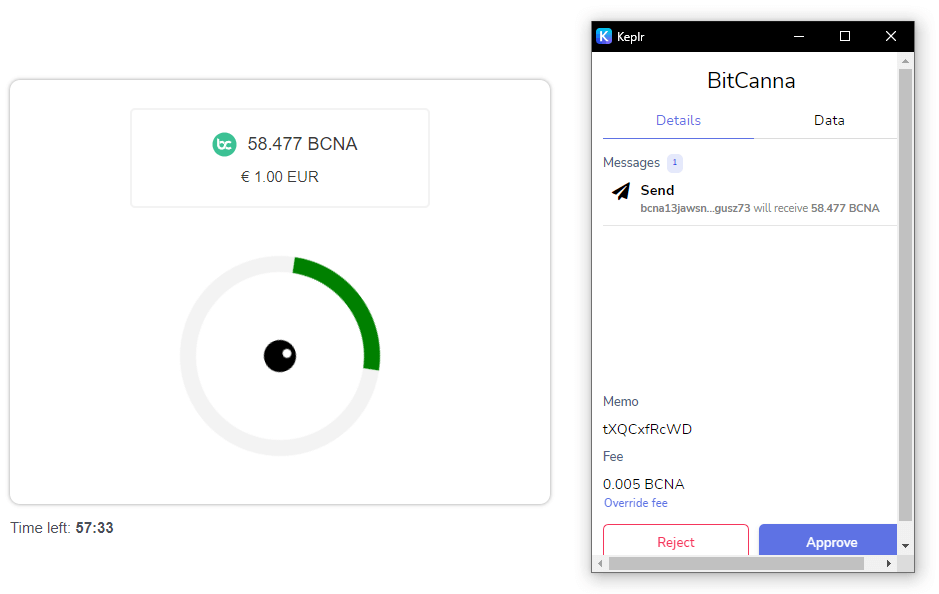
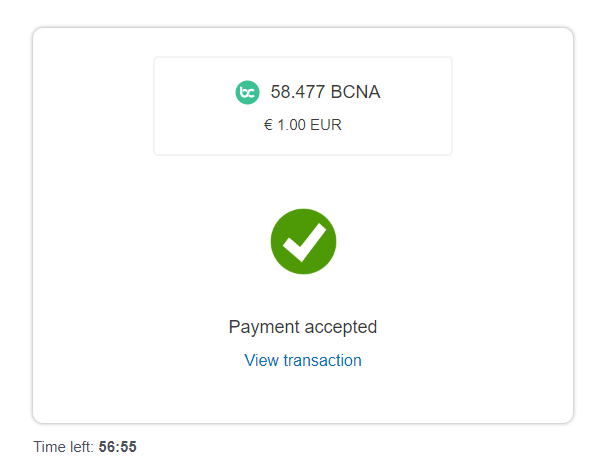
- Within a couple seconds, the transaction will be verified and approved. You've now successfully paid for your order.
